
Setting Up Your CMA Profile
How to setup your first profile for CMAs and Appraisals
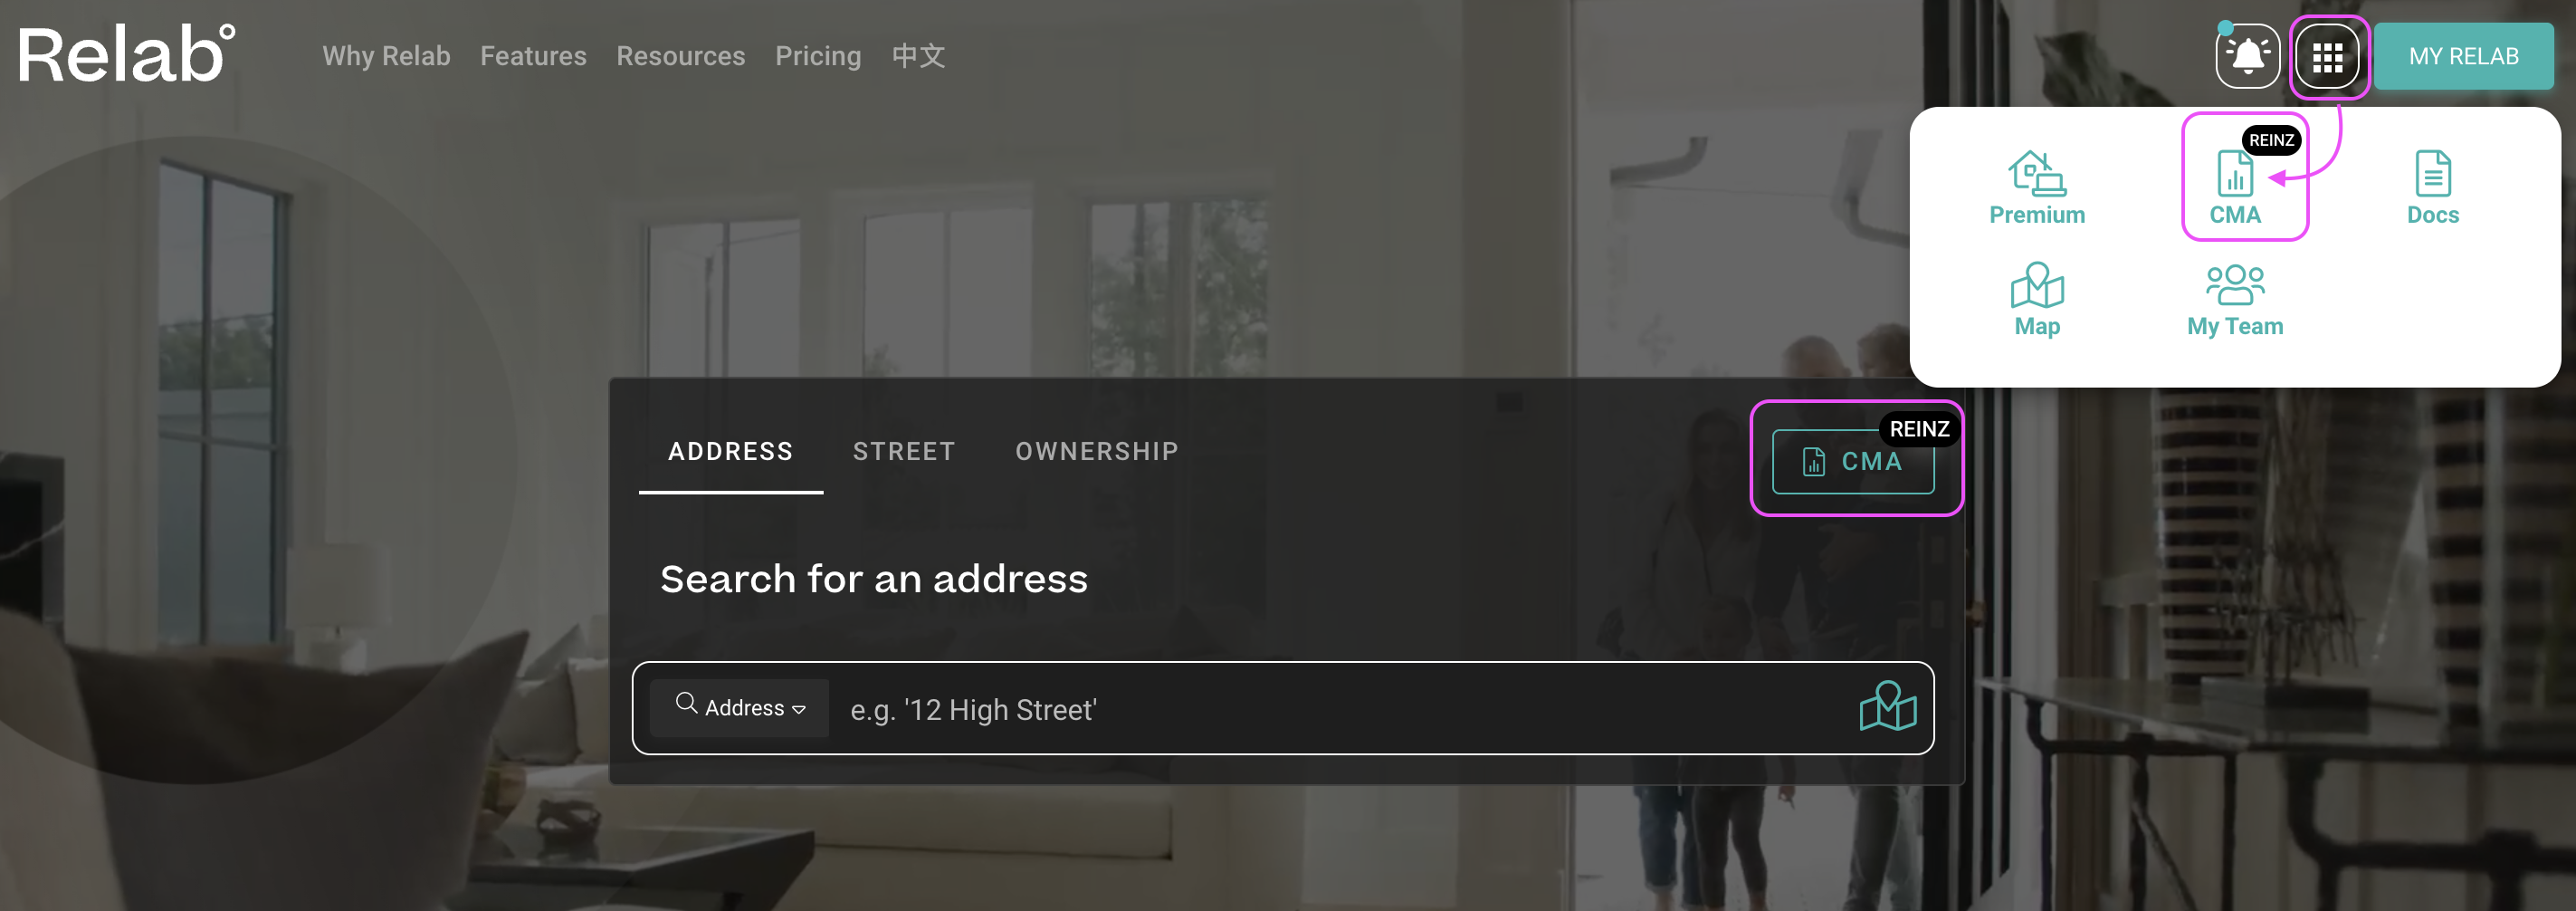
- Open your CMA Centre by 1) clicking the waffle menu and CMA or 2) CMA button above and to the right of the address search
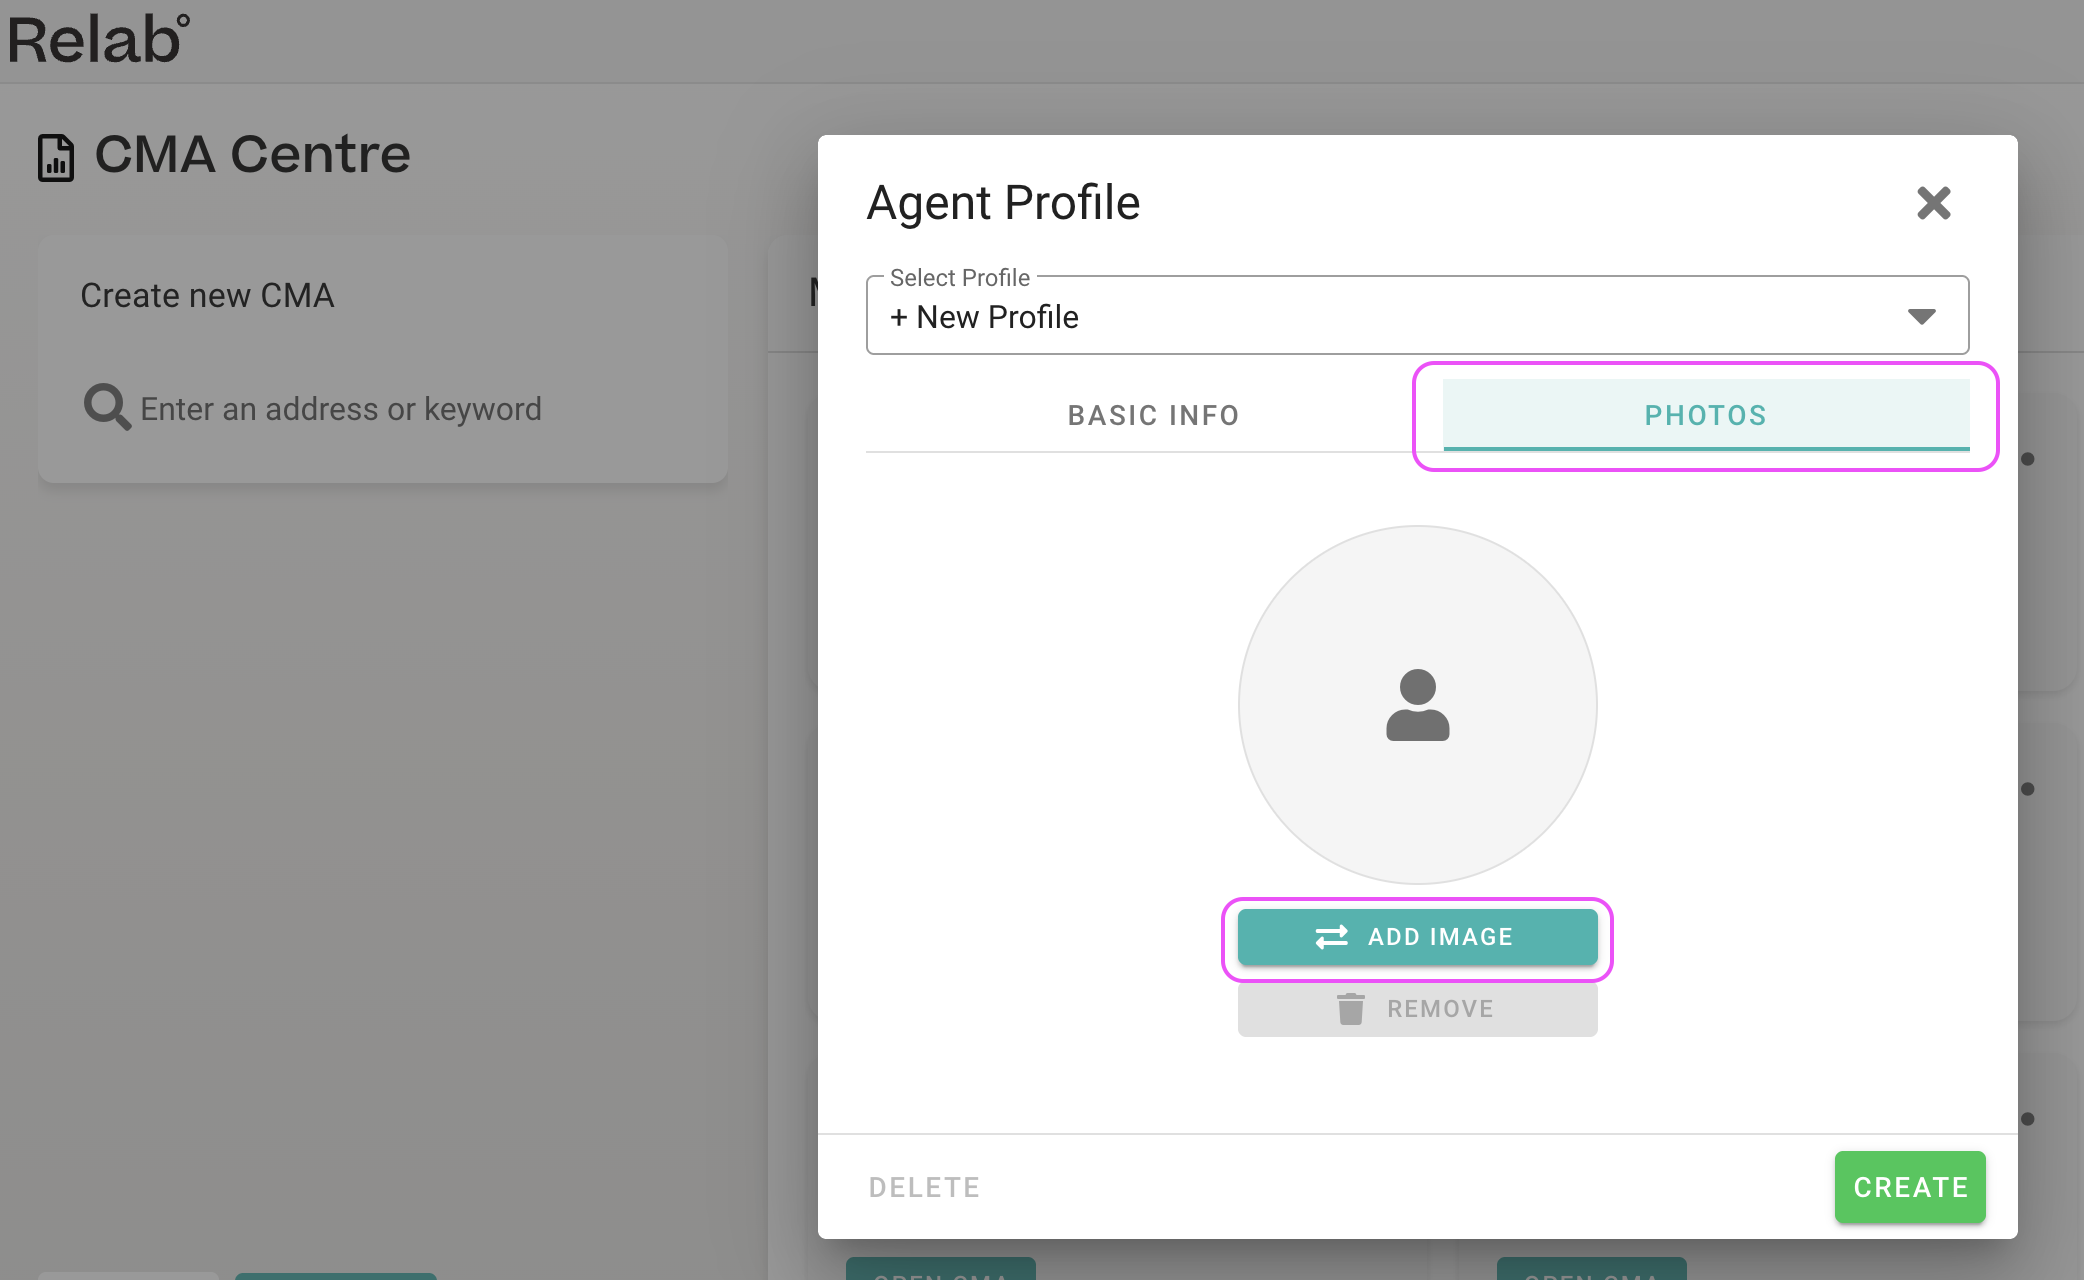
2. In the CMA Dashboard, click on the person icon located at the top right corner of the screen to create a New Profile

3. Click Select Profile
4. Then click +New Profile to start creating your profile
5. Enter your Profile Name. This name helps you identify different profiles if you create multiple ones.
6. Fill in your profile details including First and Last name, email address, website URL, company name, and business address in the corresponding fields.
7. If you'd like to add a photo or logo, upload an image by clicking Photos and Add Image
8. Once all your details are filled in, click the Create button to save your profile. Your profile is now stored and ready to use
How to apply your saved profile to CMAs and Appraisals
- Open your CMA and go to the final CMA Design Studio page
- In the left navigation bar, locate the My Details section within the editing panel
- Click Select my Profile to get a dropdown menu and select your saved profile (for example, "My Profile"). Your saved information—including name, contact details, and uploaded image—will automatically populate throughout the CMA.
Managing multiple profiles
The profile feature supports multiple profiles, allowing you to maintain separate profiles for different business contexts or team members. Each profile you create appears in the My Details dropdown menu in the CMA Design Studio for each new CMA you create.
How to Create Your Agent Profile in CMA Design Studio
When this works: This method only works if you haven't already set up an agent profile via the CMA Dashboard. If you've previously created a profile, you'll need to edit it through the CMA Dashboard instead.
- Open any CMA and navigate to the CMA Design Studio (click Next Step)
- Locate My Details in the left navigation panel
- Fill in your professional information
- Click Save as New Template to save your CMA
Your agent details are now saved and will appear in all future CMAs.
Editing Your Agent Profile
To update your agent details after initial creation, return to the CMA Dashboard and click the person icon at the top right of your screen.
For detailed instructions on managing your profile, see our guide on Setting Up Your CMA Profile.
FAQs
Can I edit my profile after creating it?
Yes, you can edit your saved profile at any time by clicking the person icon at the top of the CMA Dashboard and selecting your existing profile from the list. Make your changes and click Save to update the profile.
Do I need to create a new profile for each CMA?
No, once you create a profile, you can apply it to unlimited CMAs. The profile feature is designed to save you time by storing your information for reuse.
Can I delete a profile?
Yes, you can delete profiles you no longer need by clicking on the person icon at the top right of your CMA Dashboard and selecting profile you want, then click the delete option for the specific profile.
What if I've already created an agent profile in the CMA Dashboard?
If you've previously set up your agent profile through the CMA Dashboard, you cannot create a new profile using this method. All profile updates must be made through the CMA Dashboard using the person icon.
Can I create multiple agent profiles?
Yes, you can create and manage multiple profiles by clicking the person icon at the top right of the CMA Dashboard. This is useful for agents working across different brands or teams.